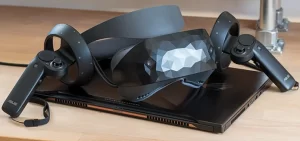
As a man who usually plays on home consoles, I could never really get into PC gaming for one simple reason: I never had a good enough PC for it. I could always just “buy” the computer of my dreams, but gaming PCs can be too expensive while regular PCs usually can’t play the latest games well. I made my peace I likely would never ascend to the “PC Master Race,” and I was perfectly okay with this. Or at least I was until I realized that I needed a proper PC for performance if I wanted to do streaming or maybe even VR. After much thinking, I decided at the start of this year to break the shackles and finally ascend to the world of PC gaming. I started by studying the information at https://gamingperipherals.net/.
My First Gaming PC
Luckily for me, a good number of writers and staff on Culture of Gaming were familiar with not just what PC to get, but to even build one. I will admit that I‘m not all that “tech savvy” as I would like to think, but I would come to find out I did a fairly decent job at it. I thought it would be fun to talk about five things I discovered during my time building my first PC and share it with others who might consider doing something similar. These were issues I ran into during my process of building and if I knew how to do these sooner, I probably could have built my PC in one day instead of a week.
As a disclaimer: I‘m not writing this to exclaim myself as some kind of master builder of PCs. Chances are that as you read this, others might tell you of alternative ways of building your PC. I only had $1200 to work with and it wasn’t like I had additional funds to spare. If you know someone who can build PCs, don’t hesitate to ask them for help.
shopping list of PC parts to get.
Lesson One: Don’t be afraid to push on the CPU screws to get them to fit
During the opening hours of building my PC, I ran into a slight complication with the CPU I was using. For some bizarre reason after putting it onto the motherboard and attaching the fan on top, it didn’t seem like the screws could reach where you had to screw them in.
You can place a fan on a CPU through a variety of methods like a bracket. Though, I hadn’t many options available other than what was before me. Through some investigation, it turns out you can press down on the screws to get them to press down and go into where it needs to go. Once it catches, go to the opposite corner and get that in too so you can screw in all four screws and make sure they properly set in.
The other thing to note about the fan is making sure you would connect it to where on the motherboard. I found out early on that cord management is very important and you don’t want cords to be spinning in front of fans. Read the manual and find out where exactly where you want to connect the fan and make sure it can reach before screwing it into place.
Lesson Two: Where to download Windows 10
One thing about the PC I made is that while it has just about everything, the one thing it’s missing is a CD Drive. This was a minor concern considering the Windows 10 program I got to install it was also on CD. So would I need to get a CD Drive and plug it in to make it work? Or use a spare USB and run the software that way? If you are in the same position as I, the latter option would likely be better if you got a spare USB that’s not in use. The program itself requires 8 GBs and if you are using Windows, you can go into the Microsoft site to get it.
Now the tricky part here I ran into was trying to find the specific program to get the installation, but I found it after getting help. If you spent $100 to get the operating system software, the technical support should be kind enough to help you get what you need. The program itself is “Windows 7 USB DVD Download Tool” and this will let you download the program required to get the installation going. Afterwards, get your product key ready so you can install it and get the ball rolling. If you run into trouble, go into the tech chat and they can help you out.
Lesson Three: Placing on the CPU connectors
Screwing the motherboard into the case and the various other parts were fairly simple, but for the power cords, that was a different monster altogether. Again, referring to the motherboard manual can help you figure out which cord plugs in where, but you can reach a point where it can feel like some are not connecting properly as they should. For me, this was during the time I was plugging in the CPU cords.
Now, depending on your motherboard, you could see multiple CPU ports. In my case, there was only one and no matter how I tried, it didn’t seem like it would go in as simple as the other plugs. This brought me to a standstill for a day since I did not understand why this was happening and felt like I was using the wrong cords. After digging through the web to see if others ran into the same problem as I, I found this image which helped to explain where I went wrong.

As a quick long story short, the pentagon shapes you see are actually smaller than the square plugs, which means they would still fit. The other problem I had was thinking the split cord had to go in one after the other when you put them in simultaneously to lock them in. It sounds silly to read, but when you are dealing with delicate connections, you want to make sure to not snap anything by mistake. Still, you do need to apply some force in to make sure it does lock in. Speaking of.
Lesson Four: Placement of the memory
After I threw everything into the computer case and closed up, I wanted to make sure everything was good to go when I use it. The good thing about computers nowadays is that some parts light up while the computer is in use, so it looks pretty and helps you find mistakes. My case and point came when I saw how one of the memory plugs did not light up like the other.
So besides how it wasn’t shining brightly, I saw under the specs that one of them was active, but not the other. It was strange since I thought I locked it in, but I found a few things that helped get it going. The first was finding out that memories apparently need to be spread apart by one. They shouldn’t be together, but be one space apart. I’m not sure if this was true or not since I had put them into the 2nd and 4th slots, but then I found out I didn’t press it in far enough.
Just like the CPU connectors, sometimes you need to apply some force after you make sure it is in. I heard it snap in, but it wasn’t completely in, thus nothing happened. Not that you need to slam or jam everything in, but it helps to make sure it is where it’s supposed to be to make sure it turns on with the rest of the computer.
Lesson Five: Properly using the SATA cord
Something as simple as “Top or Bottom” can mean the difference in organization.
It helps to get a PC with tons of data storage, but it can be to your benefit to invest in a solid state drive too. This way, you can ensure the computer runs as smoothly as possible and have the extra storage for other programs you may install.
As nice as it is to talk about the technical benefits of a solid state drive (SSD), it helps to note the importance again of cord management. Here, the SATA cord usually comes with a power supply with multiple connectors. With this, you can power both the storage and the SSD at the same time instead of needing two cords for each. The kicker here is that you want to ensure where the SSD and hard drive are.
I will admit I had to take out the hard drive after screw it in twice since I discovered how to connect the two, and it was only by a few inches it wouldn’t have connected. After playing with it and organizing the cords, I got both to connect with each other to ensure it was one less cord to worry about. Just make sure that as you pass the cords through the case, you try not to clutter the front of the motherboard. The last thing you want is something impeding the fans, and the computer overheats because you didn’t want to tidy up down there.
Lesson Six: Have a DVI cord on standby
After the PC was ready to go, it was the moment of truth. I connected everything into the computer, plugged it in, and… saw nothing. The computer did not take the HDMI cord, so I was staring at an empty screen. While I‘m used to the usual blue connector for the computer monitor (VGA), the video case I was using (MSI-Radeon RX 580 8 GB Armor) did not have it. Instead, there was one for the Digital Visual Interface (DVI) and a cord I did not have one me.
While turning on the PC for the first time can be a huge deal, it can help to have multiple connectors on standby in case something like this happens. I know for myself, I’m using it instead of the HDMI for now when I work on it, but I will try to get the HDMI to work later. This helps make things easier for me since I don’t have to swap monitor cords to go between the two PCs. So much so that I would make one more recommendation if you don’t have the money for a new mouse and keyboard to play games on.
Lesson Seven: Invest in a multi-port USB hub
While the new PC is now ready to go, I know there is still a lot of other things I would need to buy for it. This would also include a nice keyboard and mouse for it too that would be more responsive than what I have right now. While it will be time before I can get those, I had a fun alternative to help me out. It can be a pain to unplug the USB cords and put them into the other computer, I found out that having a multi-port USB Hub makes it painfully simple.
Have the Mouse and Keyboard connect to the USB hub and then you can use that connector to plug that in instead. This way, you can go from one computer to the next with little effort. My computer desk is a touch small likely won’t have room for another set on top of what I have right now. At least here, this lets me go back and forth with little complications since I will not use both computers at the same time (or at least not yet).
I love my new PC and want to enjoy playing games on it all the time now, but I’ll still use my old PC for all my work needs and random web surfing.
Many More Lessons to Learn
I would love to say I‘m now a PC guru now I have built a PC all by myself, but I know I’ve got a long way to go. I know I will need to upgrade the rest of my setting so I can make the most of this PC, but that will come later on. I‘m happy I could meet one of my New Year resolutions on building a brand new PC for myself. I‘m in hopes that a new PC, this will be the start of bigger things for myself from this point forward.
I suppose another thing I will need to do is figure out which PC games to play. After a decade or two of non-PC games, there will be a wide selection I will need to check out and enjoy. If there are any games on Steam I or anyone else should check out, be sure to tell us about them since I definitely want to take this out for a spin. For now, I will focus on a game I got many years ago that I never got to play until now: Orcs Must Die! That and try out Final Fantasy XIV.
On one final note, I will say I followed one particular video on YouTube for building a PC. It isn‘t like this is the “Be All, End All” on how to build a PC, but if you follow along and pay attention, this can help you keep the steps organized on where you‘re at in building your own PC.
So what do you think?
What would you recommend to someone building their first PC? Did you run into the same problems as I did? Leave your thoughts below and be sure to follow us here at Culture of Gaming for more editorials on the worlds of PC games and much more.


